Lighted Christmas Tree Topper

We bought a lighted Christmas tree from Amazon that had RGB lights. It lasted a season before dying. This year I decided to make a Christmas tree topper for my wife as Christmas is her favorite holiday. It involved designing a small circuit board for the LEDs, reflowing the LEDs in a toaster oven, designing and printing the topper, writing code for an ESP32 to drive the LEDs, and creating a small website to easily control the lighted topper.

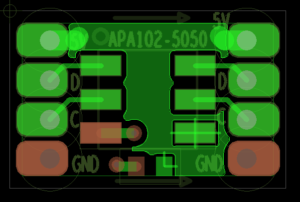
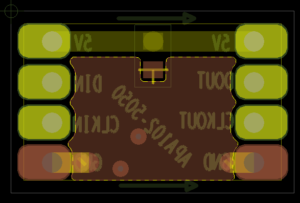
To start with, I wanted to use some new LEDs I hadn’t used before. The APA102 LEDs (also known as Dotstar) are a little more forgiving on timing than the standard Neopixel LED. I purchased the LEDs and a breakout board from Adafruit. Unfortunately I didn’t like the layout of the board as it had only one power and one ground connection which was not conducive to multiple LEDs as I’d have to share connections. I designed my own board with 4 connections on each side so I had power and ground in and power and ground out as well as data and clock in and out. The boards pins were on 2mm spacing so I could use headers as an easy way to wire in and out.

Board Top. I have a new rev that has a small pour on the ground to those pins so its not only on the bottom plane, my CAD was setup to replace etch I think and it removed it.
Board Bottom. I forgot to generate the bottom silk for the board house on the first revs, woops! Pads are for capacitors in case noise is an issue.

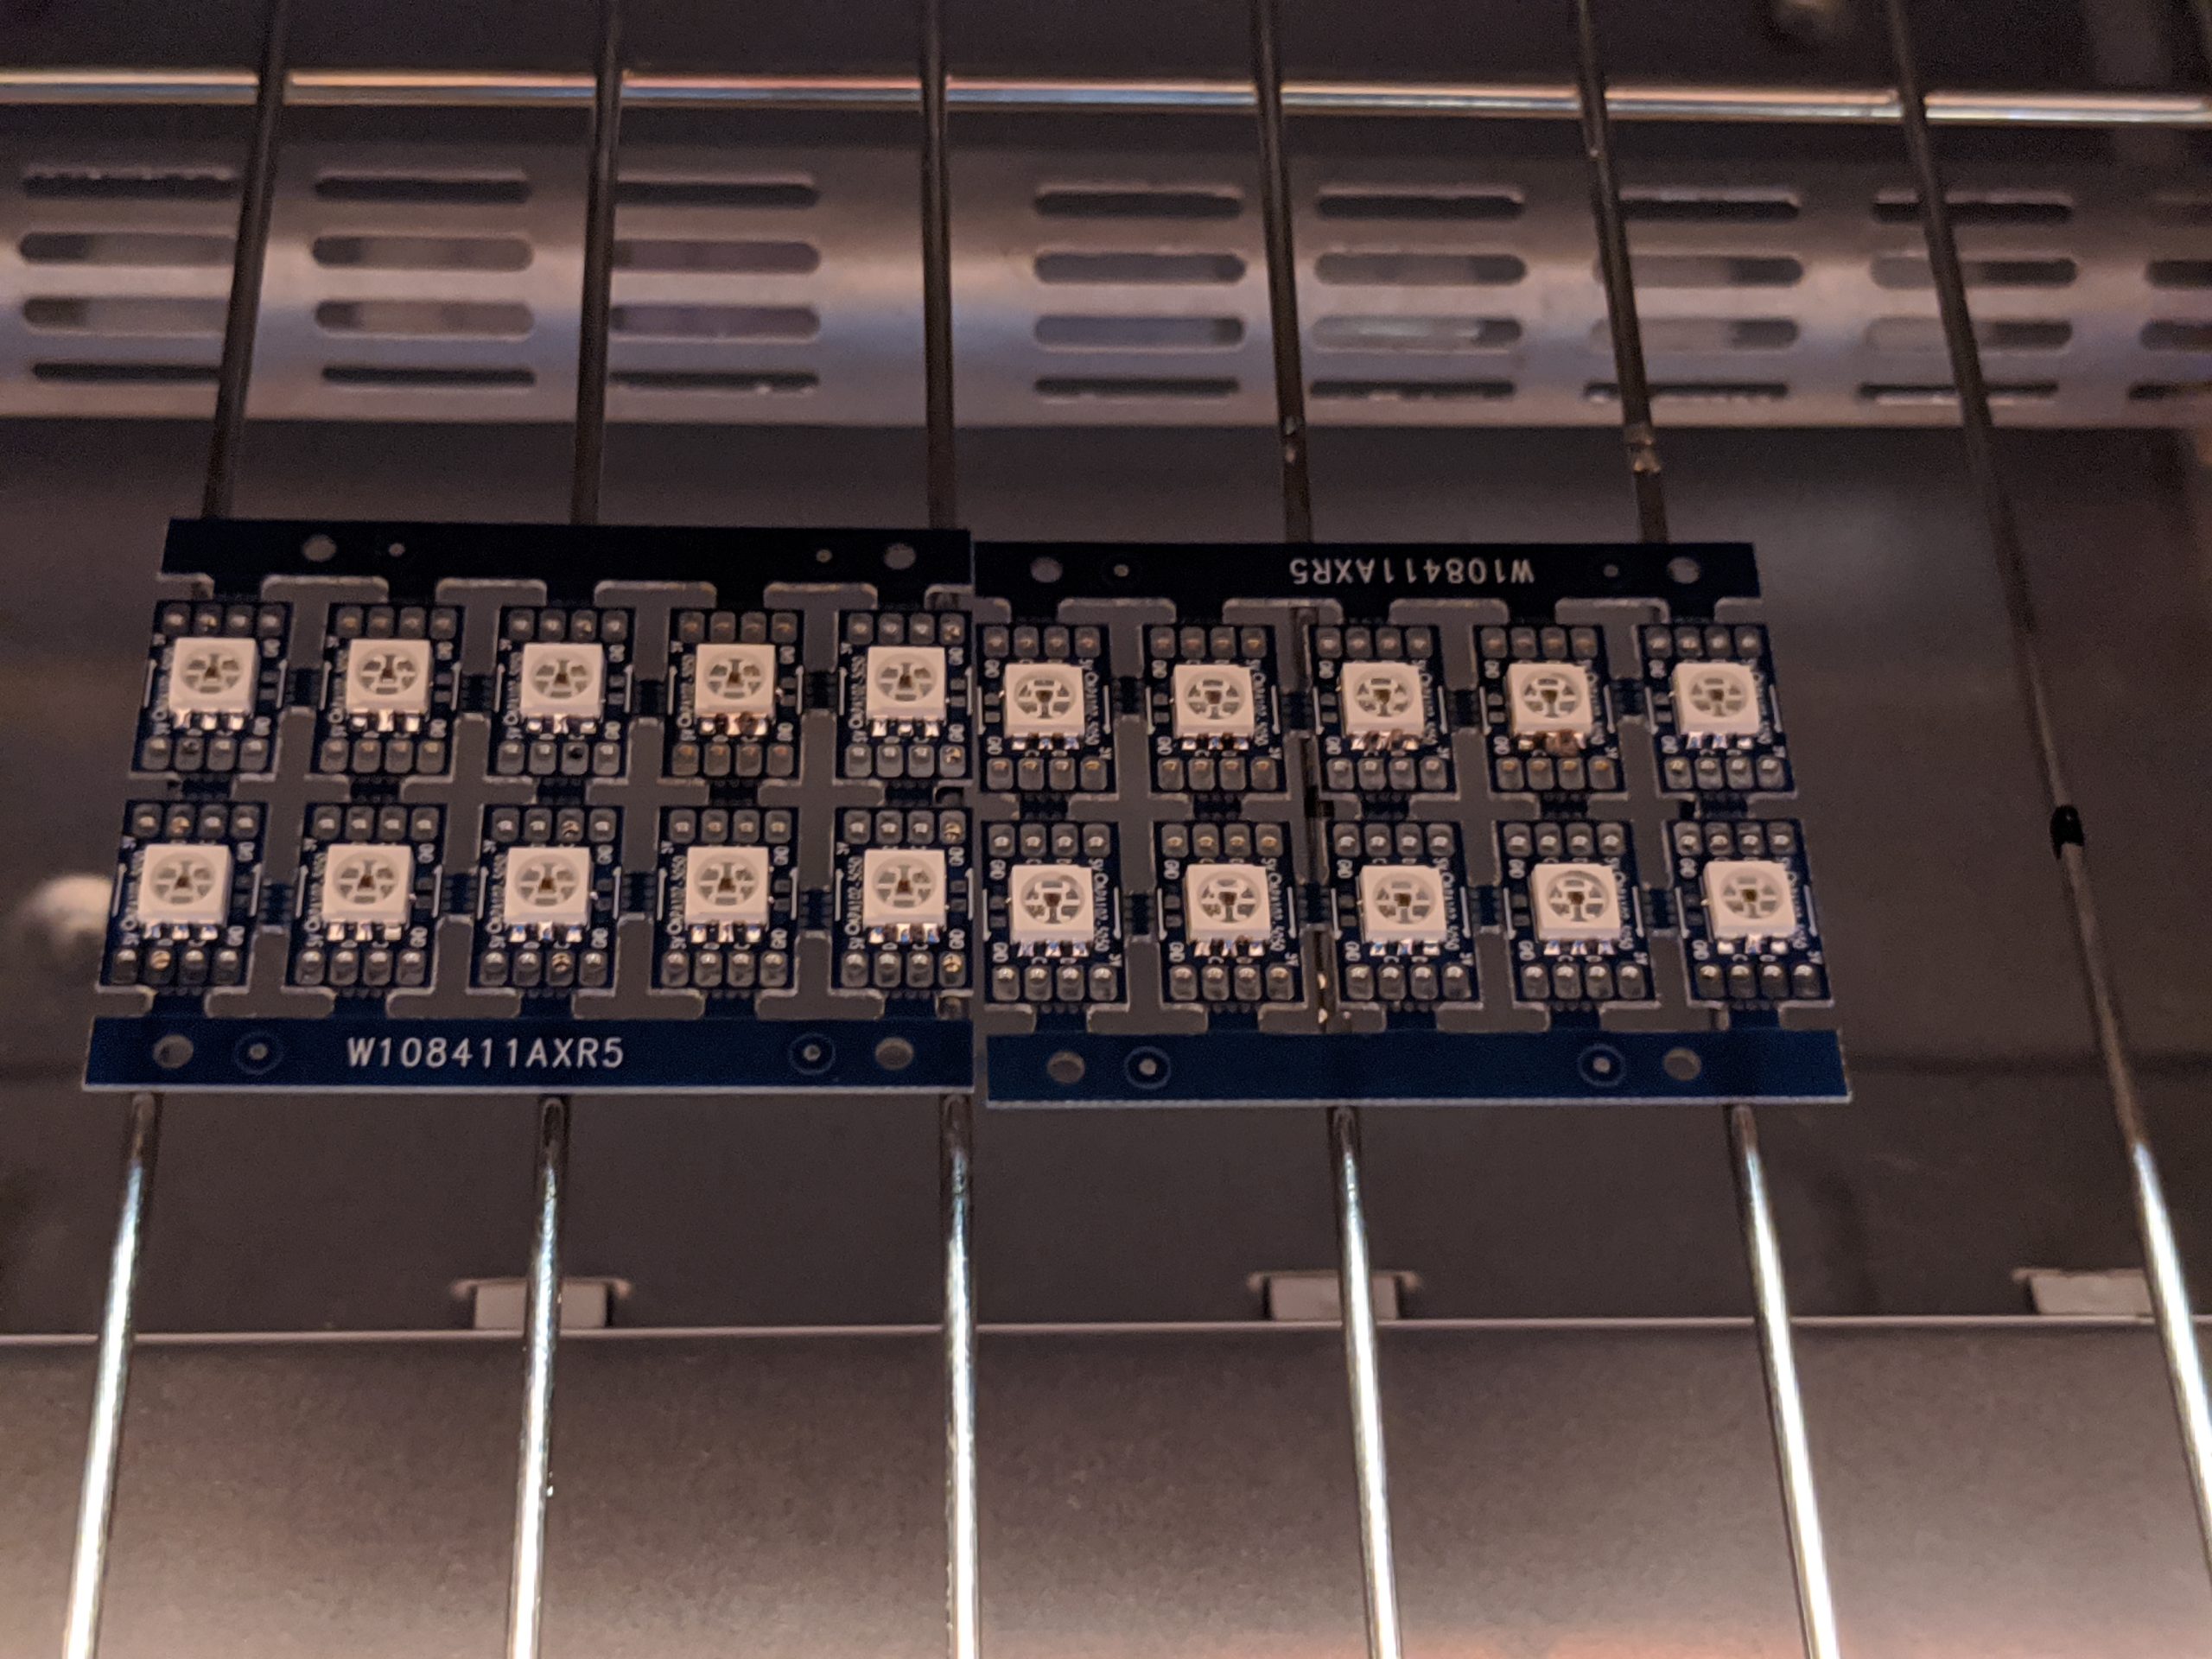
After I had the boards designed and ordered I had to solder a bunch of LEDs. I decided the best way would be to use my reflow oven I made for Ben’s show, seen here: https://www.youtube.com/watch?v=ckcHyMxqesM&t
I used a paste syringe to apply the solder, then ran it through the reflow oven. I had some failures to do with overheating the parts because my thermocouple setup inside the oven is not ideal. I will address that in the future so I don’t ruin anymore LEDs.

Oven is Hot Hot Hot!
Some good looking boards.

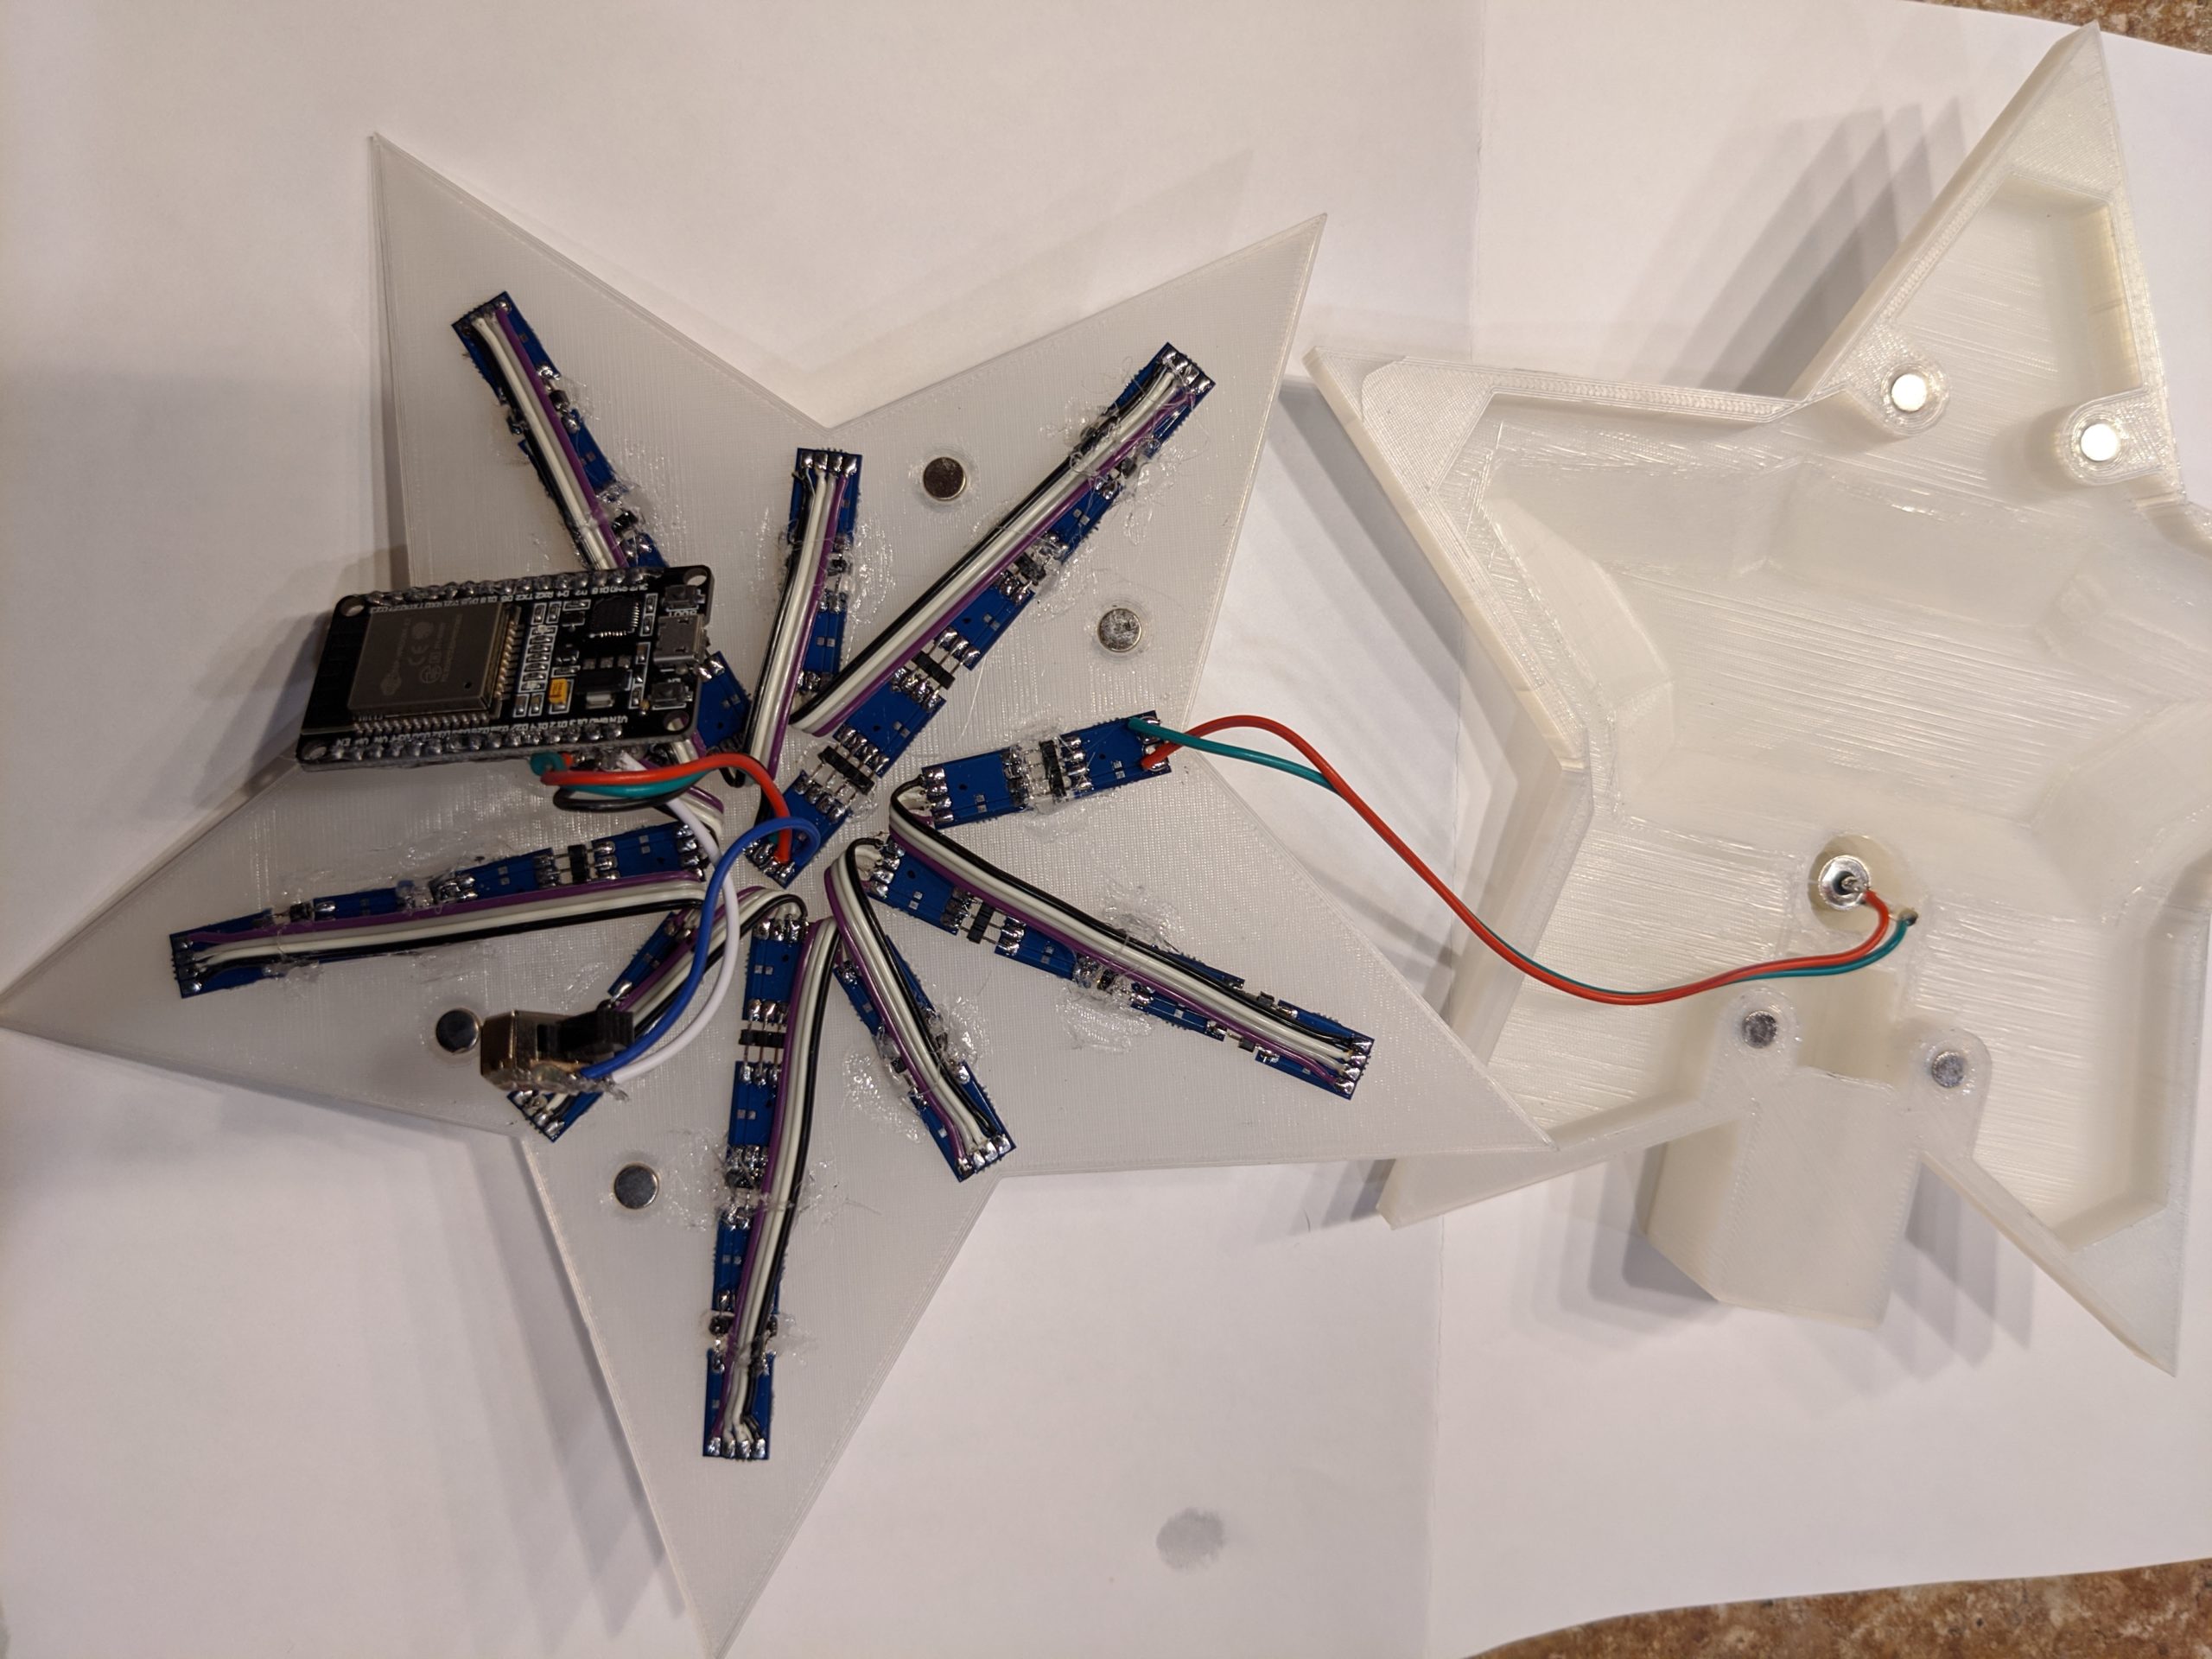
After I had the boards done I had to do the design. I designed everything in Fusion 360 and printed it out on my Prusa MK3 as large as I could get it. I made a two piece design with the front half housing the LEDs and being hollow and a few spots for magnets to attach to the back half. The back half had a sunken area to allow wiring and the controller board, a spot for the power connection (5V), magnets to attach to the front, and a hole/stand for the tree to go into.

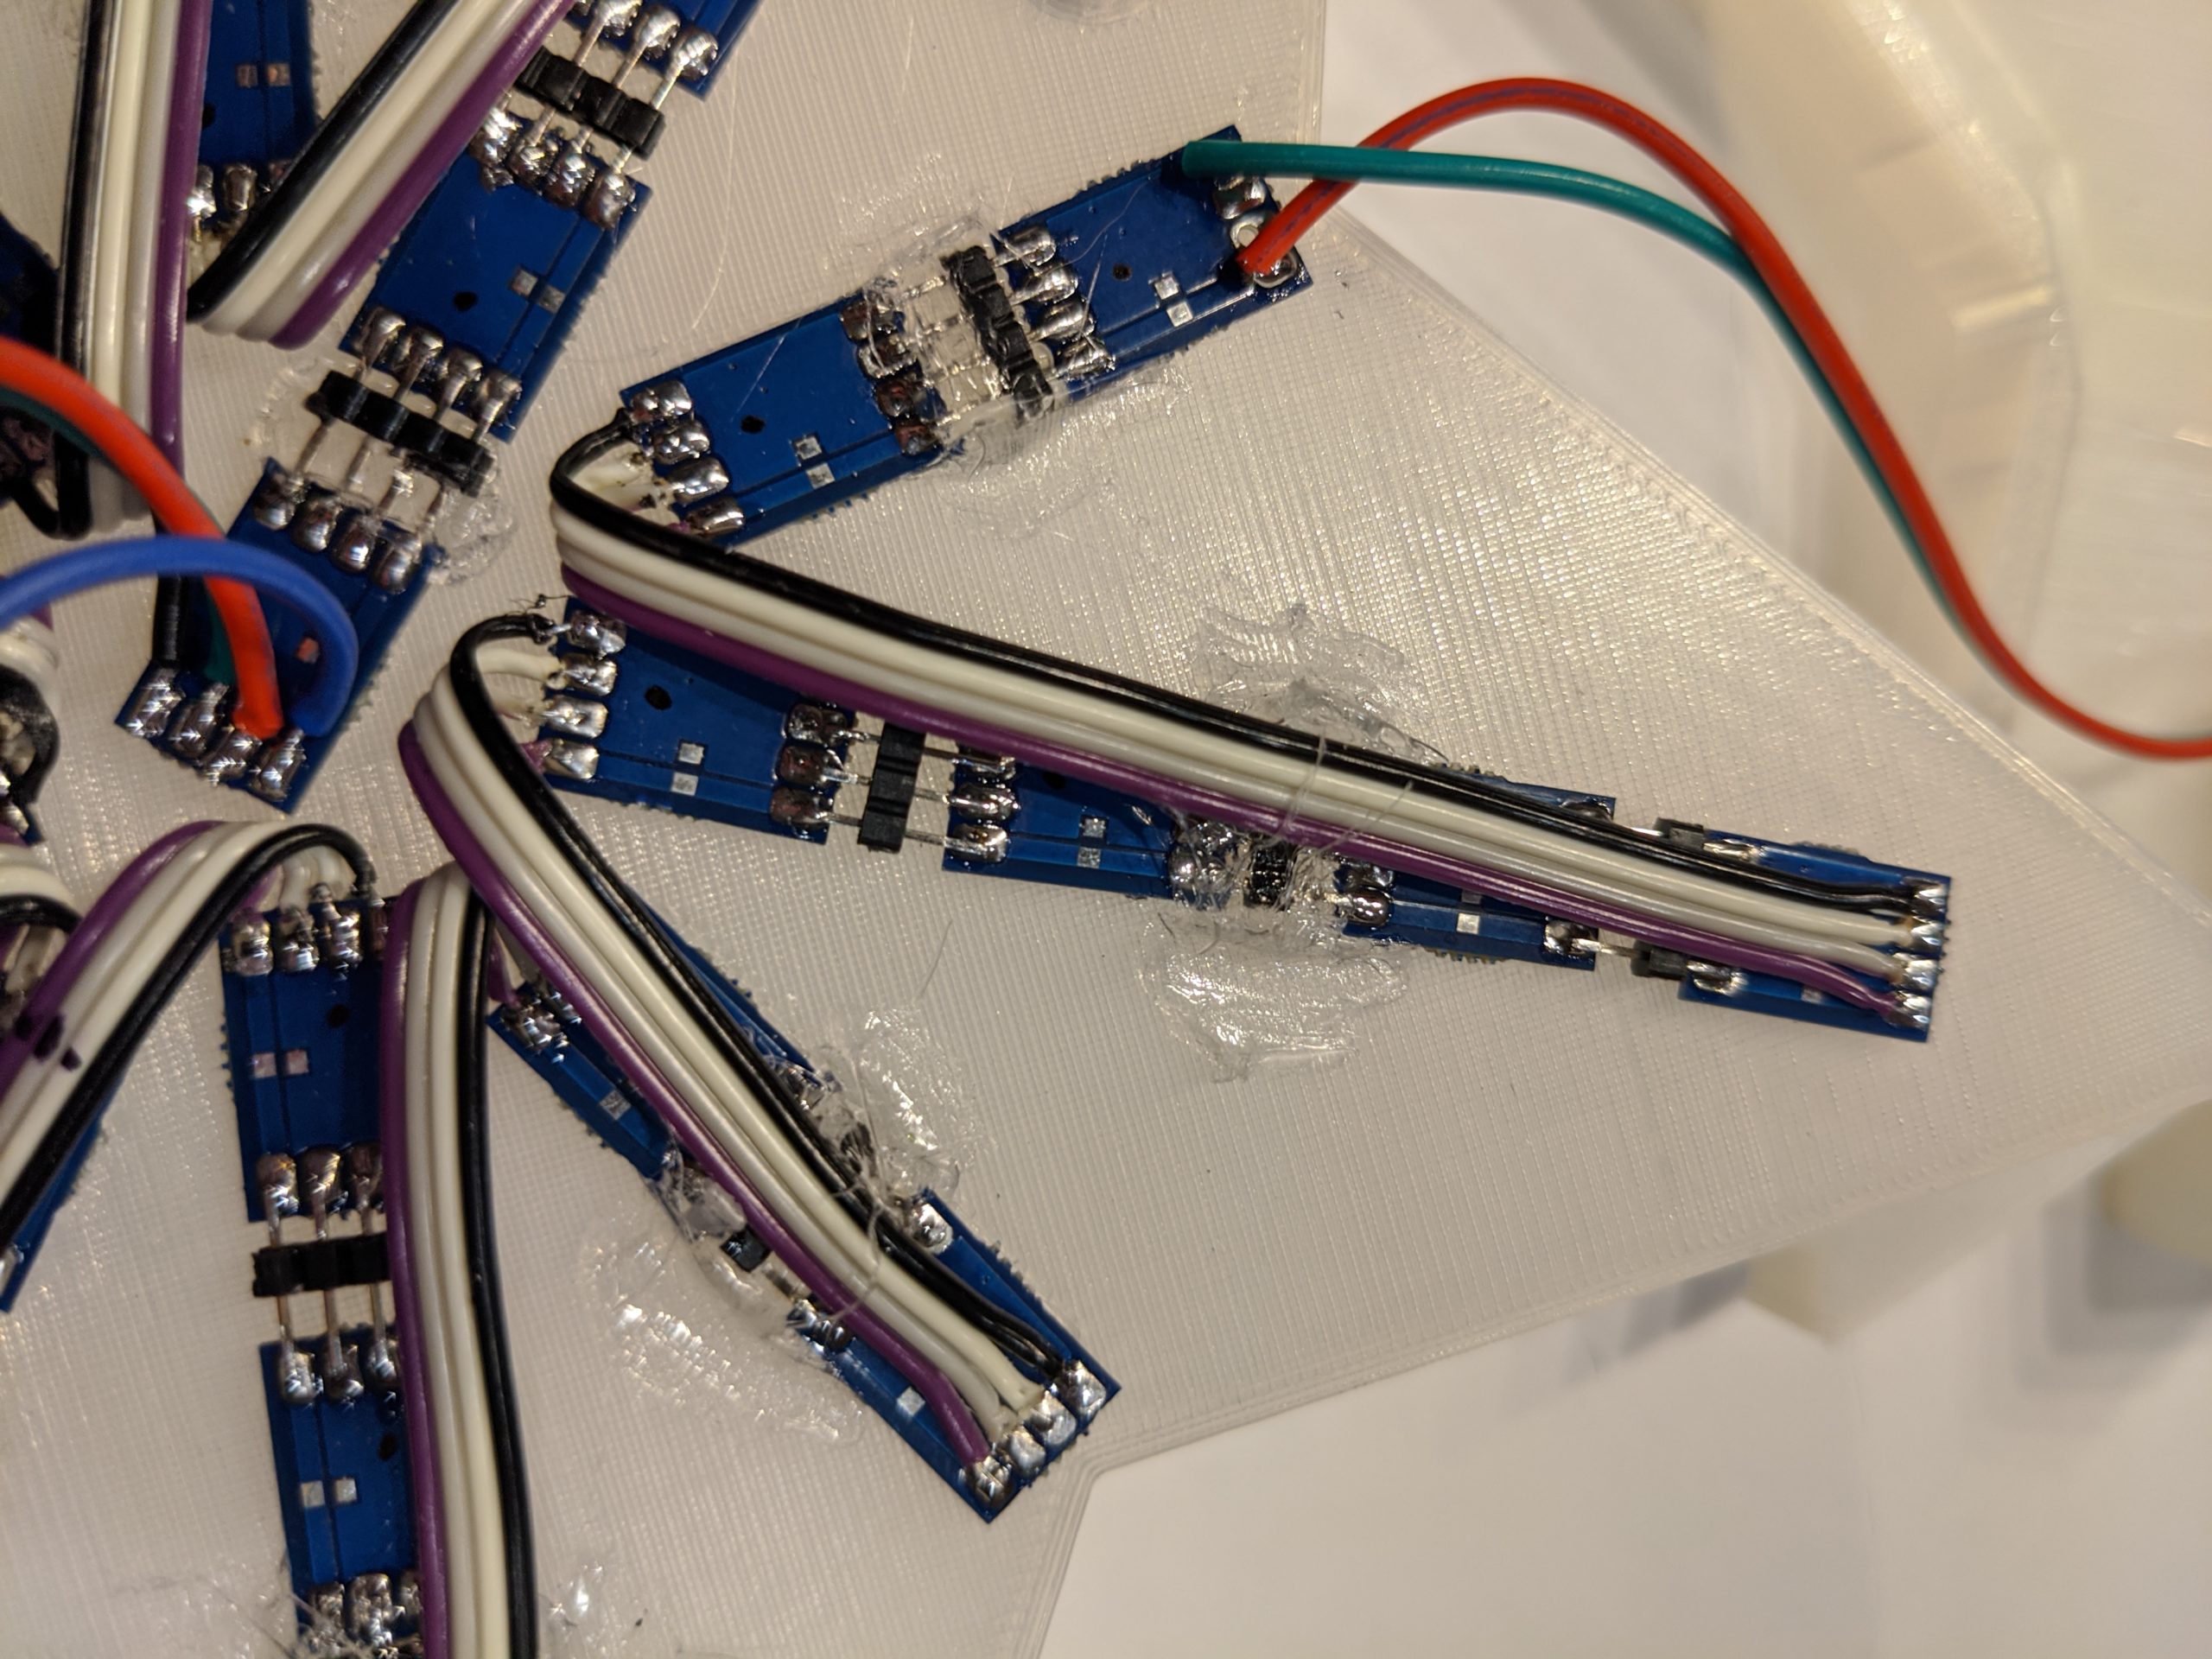
For wiring, a barrel jack is the connection for the 5V power from a wall wart. That goes into technically the last LED in the chain and it is daisy-chained through the other LEDs all the way to LED 0 which has four connections to the ESP32, 5V power, ground, MOSI, and SCK. The power is switched so it can be turned off during USB connection to prevent the wall wart from feeding my computer’s USB port with 5V. Each LED has 8 connections, the 4 on the left are Power, Data In, Clock In, Ground, and on the right Power, Data Out, Clock Out, and Ground. Power and ground are pass thru while the data and clocks pass through the LED which acts as a shift register. I used 2mm headers to connect each LED to each other where I could, and at the ends I used ribbon cable to return to the center. If you look at the LED at the center, that is LED 0, then count outwards and counter clockwise for the data path.

Top and bottom halves: 5V power comes in on the right via a barrel jack, on the left I have 31 LEDs wired in a line, an ESP32 and a switch to turn the power off to the ESP during USB connections. Click for larger picture.
Closeup of the mediocre soldering. Technically the power and ground enter the last LED and go board to board until they get to the start of the string, there MOSI, SCK, POWER, and GROUND are wired to the ESP32. Click for larger picture.

After everything was wired it was all about the code. First time using the ESP32, I followed some examples from random nerd tutorials https://randomnerdtutorials.com/esp32-web-server-arduino-ide/
and combined that with my code for my dice lamp I created a few years back https://blog.colecago.com/?p=743 . I added a new mode not used on the dice lamp and called it StarBurst and basically it lights the LEDs in a ring going faster as it goes outwards. I also changed the inputs for changing speed, brightness, and mode from buttons to webserver link hits. See the animations below.

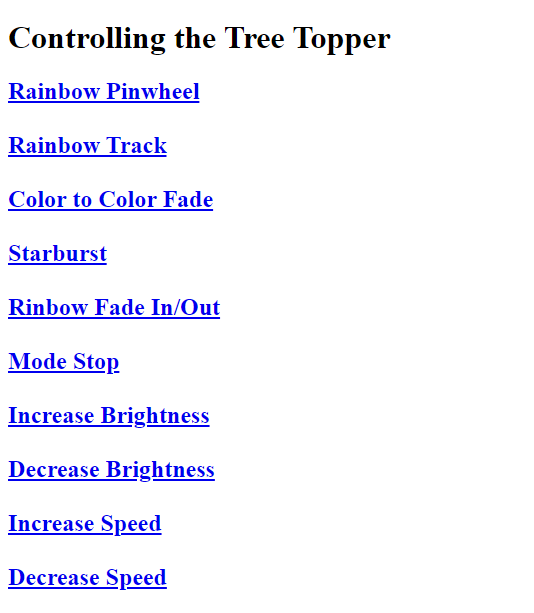
After I had all the animation modes working I put up a website on my internal NAS with links to the tree topper to change all of the settings.

To make one yourself, the 3D files are located here:
https://www.thingiverse.com/thing:4112353
or here:
https://www.prusaprinters.org/prints/18177-lighted-christmas-tree-topper-dotstar

You can buy bare boards here:

https://www.pcbway.com/project/shareproject/APA102_SPI_LED_Breakout_Board.html

You can buy LED’s here:

https://www.sparkfun.com/products/16345

ESP32 was purchased from here:

https://amzn.to/2VrNIno

Code is available here:

D20 RGB Lamp Writeup

I recently created a D20 RGB Lamp using my 3D printer, and Arduino, and RGB LED lights.  Demonstration below


Menu Flow Diagram:


Parts List:

Parts:
Arduino – https://www.sparkfun.com/products/11113
LEDs (x5) – https://www.sparkfun.com/products/13282
Power Supply – https://www.sparkfun.com/products/12889
Barrel Jack – https://www.sparkfun.com/products/10785
Push buttons (similar, x2) – https://www.sparkfun.com/products/9190
D20 Translucent – http://amzn.to/2hLp1iy

3D Files – https://www.thingiverse.com/thing:2010875


Code:

Requires Neopixel libraries, move from the zipped libraries folder to your Arduino Libraries folder.  Code was created for 5 LED’s and the following hookup-

Data Out (from Arduino) – Pin 3

SW1 (internal pullup used, connect one side to ground) – Pin 4

SW2 (internal pullup used, connect one side to ground) – Pin 5

D20 Lamp Code

/* SparkFun WS2812 Breakout Board Example
SparkFun Electronics
date: July 25, 2013
license: GNU GENERAL PUBLIC LICENSE
Requires the Adafruit NeoPixel library. It’s awesome, go get it.
https://github.com/adafruit/Adafruit_NeoPixel
This simple example code runs three sets of animations on a group of WS2812
breakout boards. The more boards you link up, the better these animations
will look.
For help linking WS2812 breakouts, checkout our hookup guide:
https://learn.sparkfun.com/tutorials/ws2812-breakout-hookup-guide
Before uploading the code, make sure you adjust the two defines at the
top of this sketch: PIN and LED_COUNT. Pin should be the Arduino pin
you’ve got connected to the first pixel’s DIN pin. By default it’s
set to Arduino pin 4. LED_COUNT should be the number of breakout boards
you have linked up.
*/
#include <Adafruit_NeoPixel.h>
#include “WS2812_Definitions.h”
#define LED_DATA 3
#define LED_COUNT 5
#define POT1 A0
#define POT2 A1
#define SW1 4
#define SW2 5
#define MENURUN 0
#define MENUBRIGHTNESS 1
#define MENUANIMATION 2
#define MENUANIMATIONCOLOR 3
#define MENUSTOP 4
#define RAINBOW 0
#define RACE 1
#define FULLFADE 2
#define FADE 3
#define RAINBOWFADE 4
#define LIGHT 1
#define DARK 0
#define MAXBRIGHTNESS 250
#define DEBOUNCEMAX 150
#define delaySpeedMax 750
unsigned char menuState = MENURUN;
unsigned char brightness = 125;
unsigned int menuButtonDebounceTime = DEBOUNCEMAX;
unsigned char menuButtonPressed = 0;
unsigned char menuButton = 0;
unsigned int menuSelectDebounceTime = DEBOUNCEMAX;
unsigned char menuSelectPressed = 0;
unsigned char menuSelect = 0;
unsigned char rainbowCounter = 0;
unsigned int delaySpeed = 150;
unsigned int delaySpeedCounter = delaySpeed;
unsigned char animationMode = RAINBOW;
unsigned long animationColor = RED;
unsigned char fadeBrightness = 0;
unsigned char fadeDirection = LIGHT;
unsigned char rainbowMode = 0;
unsigned long internalColor = RED;
unsigned int theaterJ = 0;
unsigned int theaterQ = 0;
unsigned char theaterON = 0;
// Create an instance of the Adafruit_NeoPixel class called “leds”.
// That’ll be what we refer to from here on…
Adafruit_NeoPixel leds = Adafruit_NeoPixel(LED_COUNT, LED_DATA, NEO_GRB + NEO_KHZ800);
void setup()
{
//pinMode(POT1, INPUT);
//pinMode(POT2, INPUT);
pinMode(SW1, INPUT);
digitalWrite(SW1, HIGH);
pinMode(SW2, INPUT);
digitalWrite(SW2, HIGH);
leds.begin(); // Call this to start up the LED strip.
clearLEDs(); // This function, defined below, turns all LEDs off…
leds.show(); // …but the LEDs don’t actually update until you call this.
randomSeed(analogRead(0));
animationColor = getRandomColor(0);
}
void loop()
{
unsigned int addedDelay = 0;
//unsigned int brightness = analogRead(POT1);
//unsigned int delaySpeed = analogRead(POT2);
if (!digitalRead(SW1)) {
if (menuButtonDebounceTime)
menuButtonDebounceTime–;
else {
if (!menuButtonPressed) {
menuButtonPressed = 1;
menuButton = 1;
}
else
menuButton = 0;
}
}
else {
if (menuButtonDebounceTime < DEBOUNCEMAX)
menuButtonDebounceTime++;
else
menuButtonPressed = 0;
}
if (!digitalRead(SW2)) {
if (menuSelectDebounceTime)
menuSelectDebounceTime–;
else {
if (!menuSelectPressed) {
menuSelectPressed = 1;
menuSelect = 1;
}
else
menuSelect = 0;
}
}
else {
if (menuSelectDebounceTime < DEBOUNCEMAX)
menuSelectDebounceTime++;
else
menuSelectPressed = 0;
}
if (menuButton) {
if (menuState < 4)
menuState++;
else
menuState = 0;
clearLEDs(); // This function, defined below, turns all LEDs off…
rainbowCounter = 0;
internalColor = animationColor;
rainbowMode = 0;
fadeBrightness = 0;
fadeDirection = LIGHT;
theaterJ = 0;
theaterQ = 0;
theaterON = 0;
}
switch (menuState) {
case MENURUN:
// Ride the Rainbow Road
if (menuSelect) {
if (delaySpeed < delaySpeedMax)
delaySpeed += 50;
else
delaySpeed = 50;
}
if ((animationMode == RAINBOW) || (animationMode == RACE))
addedDelay = 100;
else
addedDelay = 0;
if (delaySpeedCounter)
delaySpeedCounter–;
else {
delaySpeedCounter = delaySpeed + addedDelay;
switch (animationMode) {
case RAINBOW:
doRainbow();
break;
case RACE:
rainbowMode = 1;
doRace();
break;
case FULLFADE:
//rainbowMode = 1;
theaterChaseRainbow();
break;
case FADE:
doFade();
break;
case RAINBOWFADE:
rainbowMode = 1;
doFade();
break;
default:
break;
}
}
//delay(100); // Delay between rainbow slides
break;
case MENUBRIGHTNESS:
if (menuSelect) {
if (brightness < MAXBRIGHTNESS)
brightness += 25;
else
brightness = 25;
}
leds.setBrightness(brightness);
leds.setPixelColor(0, BLUE);
leds.setPixelColor(1, RED);
leds.setPixelColor(2, GREEN);
leds.setPixelColor(3, PURPLE);
leds.setPixelColor(4, WHITE);
break;
case MENUANIMATION:
if (menuSelect) {
if (animationMode < 4)
animationMode++;
else
animationMode = 0;
if (animationMode == 2 || animationMode == 4)
rainbowMode = 1;
else
rainbowMode = 0;
}
clearLEDs();
leds.setPixelColor(animationMode, RED);
break;
case MENUANIMATIONCOLOR:
if (menuSelect) {
animationColor = getRandomColor(animationColor);
}
leds.setPixelColor(0, GREEN);
leds.setPixelColor(1, animationColor);
break;
case MENUSTOP:
//leds.setPixelColor(0, PURPLE);
break;
default:
menuState = MENUSTOP;
break;
}
leds.show(); // …but the LEDs don’t actually update until you call this.
/*
// Indigo cylon
// Do a cylon (larson scanner) cycle 10 times
for (int i=0; i<10; i++)
{
// cylon function: first param is color, second is time (in ms) between cycles
cylon(INDIGO, 500); // Indigo cylon eye!
}
*/
/*
// A light shower of spring green rain
// This will run the cascade from top->bottom 20 times
for (int i=0; i<20; i++)
{
// First parameter is the color, second is direction, third is ms between falls
cascade(MEDIUMSPRINGGREEN, TOP_DOWN, 100);
}
*/
}
void doRainbow() {
if (rainbowCounter < 10 * 5)
rainbowCounter++;
else
rainbowCounter = 0;
rainbow(rainbowCounter);
}
void doRace() {
if (rainbowCounter < 4)
rainbowCounter++;
else {
if (rainbowMode)
internalColor = getRandomColor(internalColor);
else
internalColor = animationColor;
rainbowCounter = 0;
}
race(internalColor, rainbowCounter);
}
void doFade() {
unsigned char brightStep = brightness / 25;
if (fadeDirection == LIGHT) {
if (fadeBrightness < brightness – brightStep)
fadeBrightness += brightStep;
else {
fadeBrightness = brightness;
fadeDirection = DARK;
}
}
else {
if (fadeBrightness > brightStep)
fadeBrightness -= brightStep;
else {
fadeBrightness = 0;
fadeDirection = LIGHT;
if (rainbowMode)
internalColor = getRandomColor(internalColor);
else
internalColor = animationColor;
}
}
leds.setPixelColor(0, internalColor);
leds.setPixelColor(1, internalColor);
leds.setPixelColor(2, internalColor);
leds.setPixelColor(3, internalColor);
leds.setPixelColor(4, internalColor);
leds.setBrightness(fadeBrightness);
}
void race (unsigned long color, unsigned char pixel) {
byte red = (color & 0xFF0000) >> 16;
byte green = (color & 0x00FF00) >> 8;
byte blue = (color & 0x0000FF);
clearLEDs();
leds.setPixelColor(pixel, red, green, blue);
}
// Sets all LEDs to off, but DOES NOT update the display;
// call leds.show() to actually turn them off after this.
void clearLEDs()
{
for (int i = 0; i < LED_COUNT; i++)
{
leds.setPixelColor(i, 0);
}
}
// Prints a rainbow on the ENTIRE LED strip.
// The rainbow begins at a specified position.
// ROY G BIV!
void rainbow(byte startPosition)
{
// Need to scale our rainbow. We want a variety of colors, even if there
// are just 10 or so pixels.
int rainbowScale = 192 / LED_COUNT;
// Next we setup each pixel with the right color
for (int i = 0; i < LED_COUNT; i++)
{
// There are 192 total colors we can get out of the rainbowOrder function.
// It’ll return a color between red->orange->green->…->violet for 0-191.
leds.setPixelColor(i, rainbowOrder((rainbowScale * (i + startPosition)) % 192));
}
// Finally, actually turn the LEDs on:
//leds.show();
}
// Input a value 0 to 191 to get a color value.
// The colors are a transition red->yellow->green->aqua->blue->fuchsia->red…
// Adapted from Wheel function in the Adafruit_NeoPixel library example sketch
uint32_t rainbowOrder(byte position)
{
// 6 total zones of color change:
if (position < 31) // Red -> Yellow (Red = FF, blue = 0, green goes 00-FF)
{
return leds.Color(0xFF, position * 8, 0);
}
else if (position < 63) // Yellow -> Green (Green = FF, blue = 0, red goes FF->00)
{
position -= 31;
return leds.Color(0xFF – position * 8, 0xFF, 0);
}
else if (position < 95) // Green->Aqua (Green = FF, red = 0, blue goes 00->FF)
{
position -= 63;
return leds.Color(0, 0xFF, position * 8);
}
else if (position < 127) // Aqua->Blue (Blue = FF, red = 0, green goes FF->00)
{
position -= 95;
return leds.Color(0, 0xFF – position * 8, 0xFF);
}
else if (position < 159) // Blue->Fuchsia (Blue = FF, green = 0, red goes 00->FF)
{
position -= 127;
return leds.Color(position * 8, 0, 0xFF);
}
else //160 <position< 191 Fuchsia->Red (Red = FF, green = 0, blue goes FF->00)
{
position -= 159;
return leds.Color(0xFF, 0x00, 0xFF – position * 8);
}
}
uint32_t getRandomColor(uint32_t oldColor) {
uint32_t tempColor = oldColor;
tempColor = Wheel(random(255));
while (tempColor == oldColor) {
tempColor = Wheel(random(255));
}
return tempColor;
}
//Theatre-style crawling lights with rainbow effect
void theaterChaseRainbow() {
if (theaterON) {
//leds.setPixelColor(0, 0); //turn every third pixel off
//leds.setPixelColor(2, 0); //turn every third pixel off
//leds.setPixelColor(4, 0); //turn every third pixel off
leds.setPixelColor(1, Wheel( (1 + theaterJ) % 255)); //turn every third pixel on
leds.setPixelColor(3, Wheel( (3 + theaterJ) % 255)); //turn every third pixel on
theaterON = 0;
}
else {
//leds.setPixelColor(1, 0); //turn every third pixel off
//leds.setPixelColor(3, 0); //turn every third pixel off
leds.setPixelColor(0, Wheel( (0 + theaterJ) % 255)); //turn every third pixel on
leds.setPixelColor(2, Wheel( (2 + theaterJ) % 255)); //turn every third pixel on
leds.setPixelColor(4, Wheel( (4 + theaterJ) % 255)); //turn every third pixel on
theaterON = 1;
}
if (theaterJ < 255)
theaterJ++;
else
theaterJ = 0;
}
// Input a value 0 to 255 to get a color value.
// The colours are a transition r – g – b – back to r.
uint32_t Wheel(byte WheelPos)
{
WheelPos = 255 – WheelPos;
if (WheelPos < 85)
{
return leds.Color(255 – WheelPos * 3, 0, WheelPos * 3);
}
else if (WheelPos < 170)
{
WheelPos -= 85;
return leds.Color(0, WheelPos * 3, 255 – WheelPos * 3);
}
else
{
WheelPos -= 170;
return leds.Color(WheelPos * 3, 255 – WheelPos * 3, 0);
}
}

Homemade CS Go Swag

Ben Heck recently visited a friend from Valve.  He had promised me some cool CS Go swag as I’ve played Counterstrike off and on for many years (since 1.2).  Unfortunately they didn’t have any CS Go swag and we got Portal swag instead, still pretty cool.


Well this was our typical tinker-Saturday and I had some new NeoPixels that I got from Sparkfun.  Ben started playing around with them and his acrylics.  He decided to do an edge lit acrylic experiment.  I suggested the CS Go logo so I’d have something cool for my desk.  We found a couple of suitable logos and then Ben edited the best ones into one that would work well for our acrylic.


We cut the log on two pieces of acrylic, one clear that appeared to work great for edge lit, and one frosted, which works better to diffuse a backlight.  Ben then 3D printed a base to fit the NeoPixels and the acrylic.  We put them together for some testing and it worked great.  I then took the project home, hooked everything up to my Teensy 2.0 board and modified the code to have a little more functionality so I could switch between the different modes.


Here is a video of it in action


And here is the Arduino code

NeoPixel data line is Pin2, interrupt is Pin5

#include <Adafruit_NeoPixel.h>

#define PIN 2

// Parameter 1 = number of pixels in strip
// Parameter 2 = Arduino pin number (most are valid)
// Parameter 3 = pixel type flags, add together as needed:
// NEO_KHZ800 800 KHz bitstream (most NeoPixel products w/WS2812 LEDs)
// NEO_KHZ400 400 KHz (classic ‘v1’ (not v2) FLORA pixels, WS2811 drivers)
// NEO_GRB Pixels are wired for GRB bitstream (most NeoPixel products)
// NEO_RGB Pixels are wired for RGB bitstream (v1 FLORA pixels, not v2)
Adafruit_NeoPixel strip = Adafruit_NeoPixel(8, PIN, NEO_GRB + NEO_KHZ800);

// IMPORTANT: To reduce NeoPixel burnout risk, add 1000 uF capacitor across
// pixel power leads, add 300 – 500 Ohm resistor on first pixel’s data input
// and minimize distance between Arduino and first pixel. Avoid connecting
// on a live circuit…if you must, connect GND first.

volatile unsigned int mode;
volatile boolean superBreakout;

void setup() {
strip.begin();
mode = 0;
superBreakout = 0;
pinMode(5, INPUT);
digitalWrite(5, HIGH);
clearWipe();
strip.show(); // Initialize all pixels to ‘off’
delay(50);
attachInterrupt(0, changeMode, FALLING);
}

void loop() {

if ( digitalRead(5) == HIGH){
superBreakout = 0;
}

switch (mode){

case 0:
// Some example procedures showing how to display to the pixels:
colorWipe(strip.Color(255, 0, 0), 50); // Red
colorWipe(strip.Color(0, 255, 0), 50); // Green
colorWipe(strip.Color(0, 0, 255), 50); // Blue
// Send a theater pixel chase in…
theaterChase(strip.Color(127, 127, 127), 50); // White
theaterChase(strip.Color(127, 0, 0), 50); // Red
theaterChase(strip.Color( 0, 127, 0), 50); // Green
theaterChase(strip.Color( 0, 0, 127), 50); // Blue
// Send rainbow code
rainbow(20);
rainbowCycle(20);
theaterChaseRainbow(50);
break;

case 1:
// Some example procedures showing how to display to the pixels:
colorWipe(strip.Color(255, 0, 0), 50); // Red
colorWipe(strip.Color(0, 255, 0), 50); // Green
colorWipe(strip.Color(0, 0, 255), 50); // Blue
break;

case 2:
// Send a theater pixel chase in…
theaterChase(strip.Color(127, 127, 127), 50); // White
theaterChase(strip.Color(127, 0, 0), 50); // Red
theaterChase(strip.Color( 0, 127, 0), 50); // Green
theaterChase(strip.Color( 0, 0, 127), 50); // Blue
break;

case 3:
// Send rainbow code
rainbow(50);
rainbowCycle(25);
theaterChaseRainbow(50);
break;

case 4:
rainbow(50);
break;

case 5:
rainbowCycle(25);
break;

case 6:
theaterChaseRainbow(50);
break;

case 7:
clearWipe();
strip.show(); // Initialize all pixels to ‘off’
break;

case 8:
mode = 0;
break;
}

}

void changeMode(){
if (superBreakout == 0){
mode++;
clearWipe();
strip.show(); // Initialize all pixels to ‘off’
superBreakout = 1;
while(digitalRead(5) == LOW);
}
}

void clearWipe(){
for (int i = 0; i < 8; i++){
strip.setPixelColor(i,strip.Color(0,0,0));
}
}

// Fill the dots one after the other with a color
void colorWipe(uint32_t c, uint8_t wait) {
for(uint16_t i=0; i<strip.numPixels(); i++) {
strip.setPixelColor(i, c);
strip.show();
if (superBreakout)
break;
delay(wait);
}
}

void rainbow(uint8_t wait) {
uint16_t i, j;

for(j=0; j<256; j++) {
for(i=0; i<strip.numPixels(); i++) {
strip.setPixelColor(i, Wheel((i+j) & 255));
}
strip.show();
if (superBreakout)
break;
delay(wait);
}
}

// Slightly different, this makes the rainbow equally distributed throughout
void rainbowCycle(uint8_t wait) {
uint16_t i, j;

for(j=0; j<256*5; j++) { // 5 cycles of all colors on wheel
for(i=0; i< strip.numPixels(); i++) {
strip.setPixelColor(i, Wheel(((i * 256 / strip.numPixels()) + j) & 255));
}
strip.show();
if (superBreakout)
break;
delay(wait);
}
}

//Theatre-style crawling lights.
void theaterChase(uint32_t c, uint8_t wait) {
for (int j=0; j<10; j++) { //do 10 cycles of chasing
for (int q=0; q < 3; q++) {
for (int i=0; i < strip.numPixels(); i=i+3) {
strip.setPixelColor(i+q, c); //turn every third pixel on
}
strip.show();
if (superBreakout)
break;
delay(wait);

for (int i=0; i < strip.numPixels(); i=i+3) {
strip.setPixelColor(i+q, 0); //turn every third pixel off
}
}
}
}

//Theatre-style crawling lights with rainbow effect
void theaterChaseRainbow(uint8_t wait) {
for (int j=0; j < 256; j++) { // cycle all 256 colors in the wheel
for (int q=0; q < 3; q++) {
for (int i=0; i < strip.numPixels(); i=i+3) {
strip.setPixelColor(i+q, Wheel( (i+j) % 255)); //turn every third pixel on
}
strip.show();
if (superBreakout)
break;
delay(wait);

for (int i=0; i < strip.numPixels(); i=i+3) {
strip.setPixelColor(i+q, 0); //turn every third pixel off
}
}
}
}

// Input a value 0 to 255 to get a color value.
// The colours are a transition r – g – b – back to r.
uint32_t Wheel(byte WheelPos) {
if(WheelPos < 85) {
return strip.Color(WheelPos * 3, 255 – WheelPos * 3, 0);
} else if(WheelPos < 170) {
WheelPos -= 85;
return strip.Color(255 – WheelPos * 3, 0, WheelPos * 3);
} else {
WheelPos -= 170;
return strip.Color(0, WheelPos * 3, 255 – WheelPos * 3);
}
}

Components

Teensy 2.0 – https://www.sparkfun.com/products/12765

NeoPixel – https://www.sparkfun.com/products/12661